
Did you know that your Azure Policy data is in Azure Resource Graph? It is under the policyresources table. Since it is in Azure Resource Graph that means we can query it from Azure Workbooks, and create Workbooks like my inventory workbook. If you’re not familiar with Azure Resource Graph I have a primer you can go through here. In this post I’ll show you the basics of how to build an Azure Policy Compliance Workbook.
Extracting Data
The first thing we need to do is to extract our data out of nested fields. Hence why I linked to my Resource Graph post above. Thankfully there isn’t too much complication in getting useful data out.
policyresources
| extend ComplianceState = tostring(properties['complianceState'])
| extend ResourceGroup = tostring(properties['resourceGroup'])
| extend PolicyAssignmentName = tostring(properties['policyAssignmentName'])
| extend ResourceLocation = tostring(properties['resourceLocation'])
As mentioned above Azure Policy data gets put into the policyresources table. From there some of the most common fields you’ll want to extract are Compliance State, Resource Group, Policy Assignment Name and Resource Location.
This would then allow you to summarize compliance by compliance state, or by compliance state and resource group
Summarize by Compliance State
policyresources
| extend ComplianceState = tostring(properties['complianceState'])
| summarize count() by ComplianceState
Summarize by Compliance State and Resource Group
policyresources
| extend ComplianceState = tostring(properties['complianceState'])
| extend ResourceGroup = tostring(properties['resourceGroup'])
| summarize count() by ComplianceState, ResourceGroup
You could take queries like these and run them into a Workbook and it would be pretty good. BUT! Workbooks are way cooler than that.
Workbook Parameters
You’re using Azure Policy, so you must have a great tagging structure you can leverage, right? If you do you can do all kinds of fancy things like building a cost management workbook, or a dynamic monitoring application workbook. Given that proper tagging structure we can apply it to Azure Policy too!
First, policyresources table has no knowledge of Azure Tags, though. So we have to do a join with the resources table. This is an example query where we get all resources with the tag Demo_Application that has a value of Azure_Infra
resources
| where tostring(tags.Demo_Application) == "Azure_Infra"
| extend id = tolower(id)
| join(policyresources
| extend id = tolower(properties['resourceId'])) on id
And this totally works, we can join our Resources filtered by tag with Policy data.
So next we need some Parameters. Typically, I use Subscription, and then follow that up with tags like Environment for production, non prod, QA etc. Then, depending on your environment, you may have Application, or AppCode, or whatever it may be. I will show you how to create your parameter no matter what your tag name is.
To create our Environment parameter we do a new Parameter as a Drop Down in an empty Workbook. Then, select Required and Allow Multiple Selections.
Then for the query we select Azure Resource Graph, Subscriptions for our Subscriptions parameter, that way if a user changes the subscription the parameters automatically update with data from the selected subscription(s).
resources
| distinct tostring(tags.Demo_Environment)
| where tags_Demo_Environment != ''
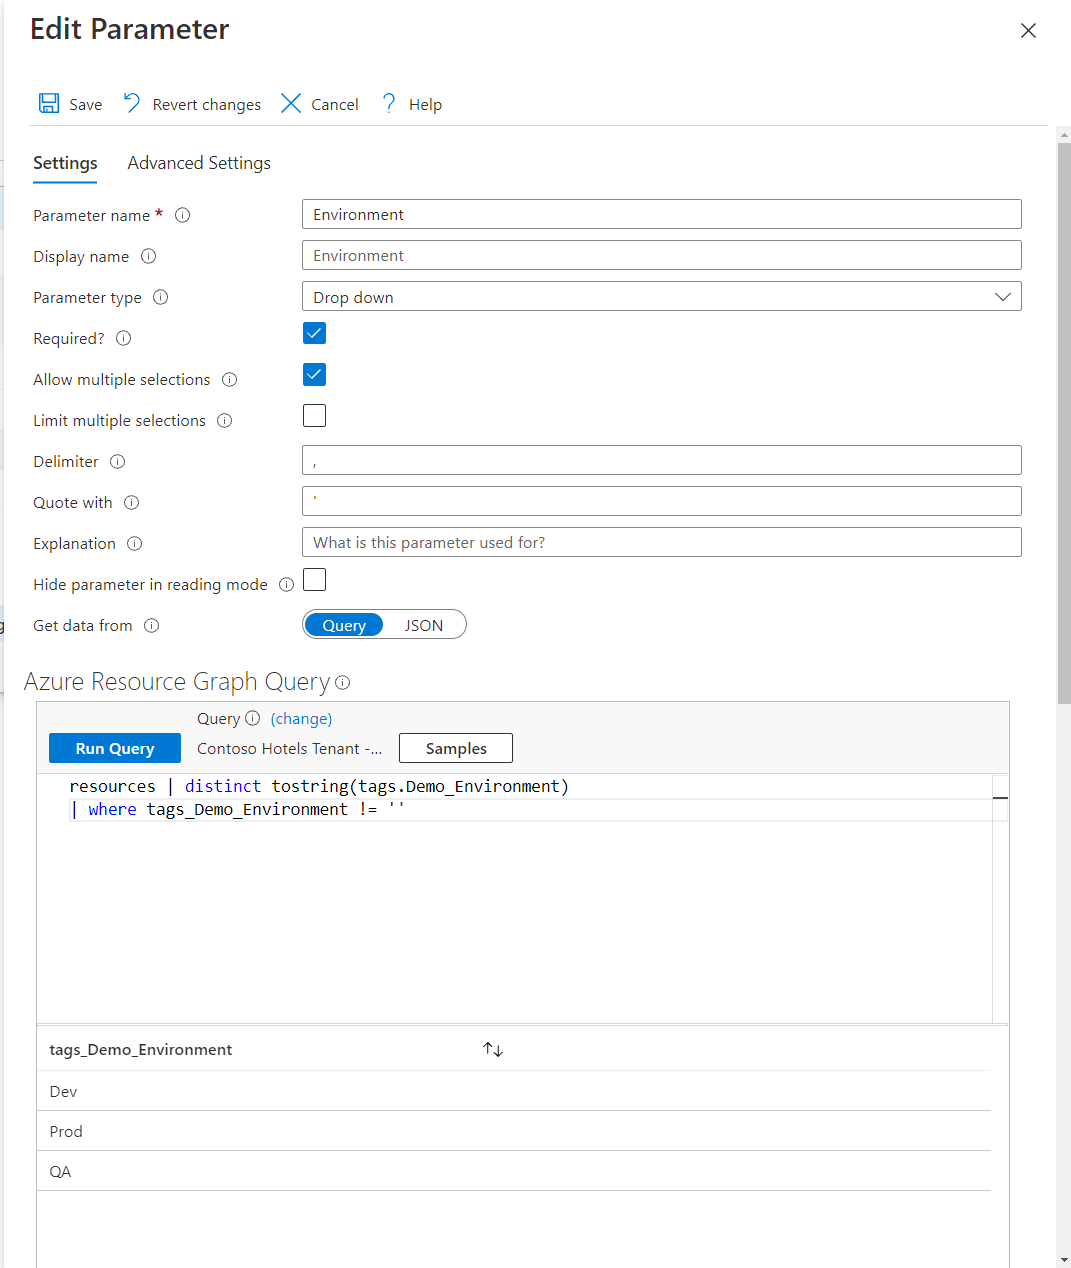
This will dynamically get all tags for Demo_Environment. For your Azure environment you’ll need to change “Demo_Environment” to whatever name you’ve chosen for that tag.
Similarly we do the same thing for our Application tag, in this instance called Demo_Application.
resources
| where tags.Demo_Environment in ({Environment}) or '*' in ({Environment})
| distinct tostring(tags.Demo_Application)
| where tags_Demo_Application != ''
Another thing to note is I have added the Environment Parameter inside the Application Parameter, such that change the Environment to Prod only brings back production resources.
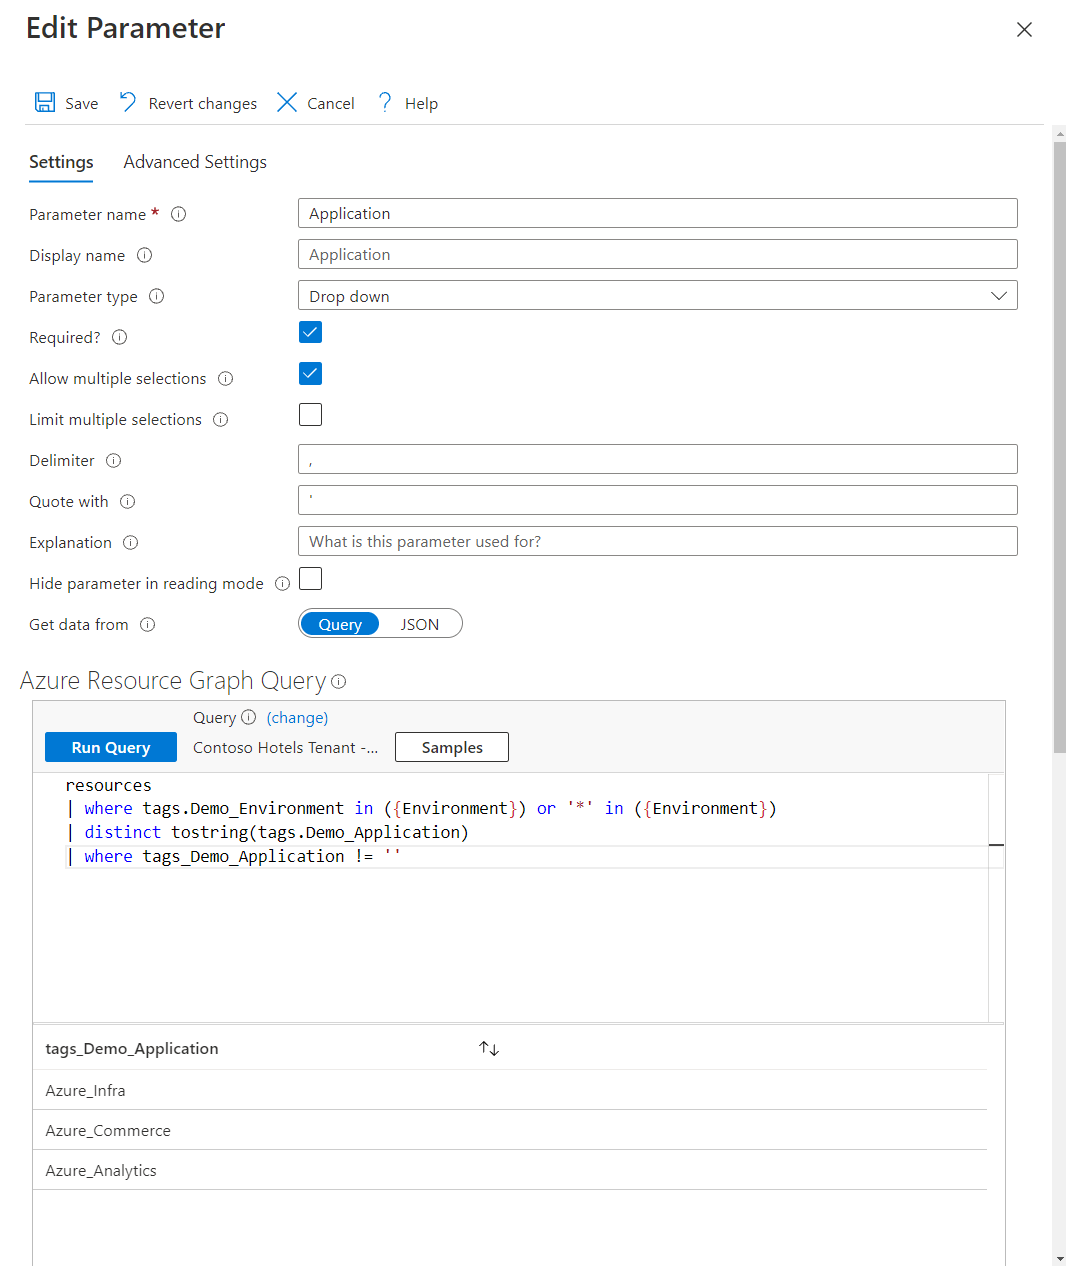
Again, you’ll need to change “Demo_Application” to your specific tag name.
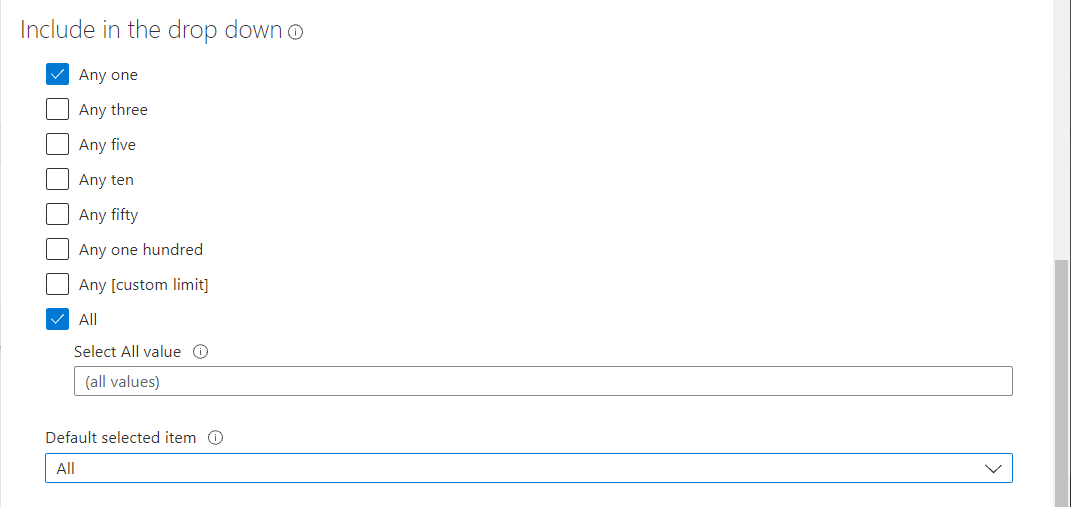
For both parameters, I have selected Any One and All as included in the drop down, and set the default to All.
Additionally you can do other parameters like Compliance state, so that if you select Non Compliant, it only shows non compliant resources and their resource groups and locations.
Building Azure Compliance Workbook
Now that we have the Parameters set. We can start building out our visualizations in our Workbook.
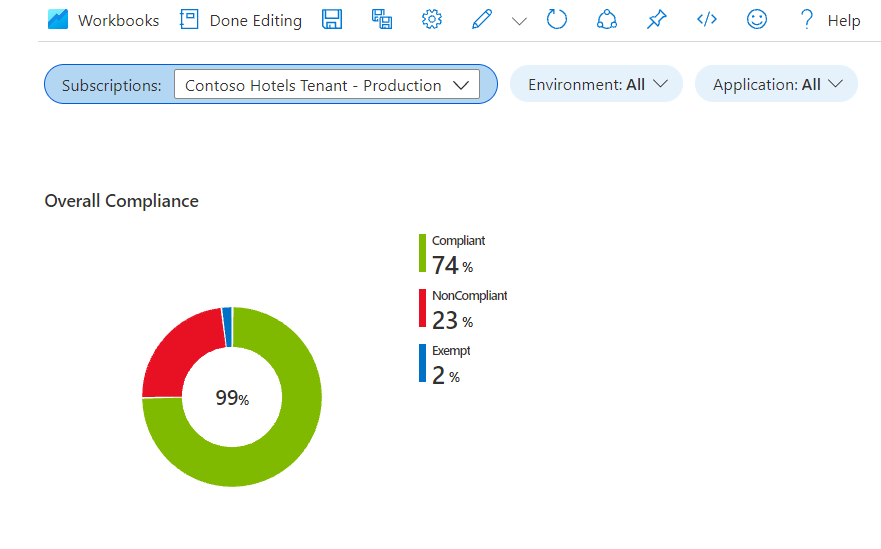
First a general overview pie chart. Personally I like to take a top down approach with my Workbooks. Where the most generalized data is at the top and as you scroll down in the workbook, it gets more detailed.
resources
| where tags.Demo_Environment in ({Environment}) or '*' in ({Environment})
| where tags.Demo_Application in ({Application}) or '*' in ({Application})
| extend id = tolower(id)
             | join(policyresources
             | extend ComplianceState = tostring(properties['complianceState'])
             | extend id = tolower(properties['resourceId'])) on id
| extend Managed_By = tostring(tags.managed_by)
| extend properties = properties1
| summarize Compliant = 100 * countif(ComplianceState == 'Compliant') / count(),
                        NonCompliant = 100 * countif(ComplianceState == 'NonCompliant') / count() ,
                        Exempt = 100 * countif(ComplianceState == 'Exempt') / count()
| extend Chart = pack_all()
| project Chart
| mv-expand bagexpansion = array Chart
| project tostring(ComplianceState = Chart[0]), tolong(Percent = Chart[1])
This takes the Parameters discussed above, gets them in the resources table, joins with the policyresources table, then summarizes them into percentage. You can remove the percentage by getting rid of 100 *, / count() and the last 4 lines of the query. This would get you just the count for each compliance state.
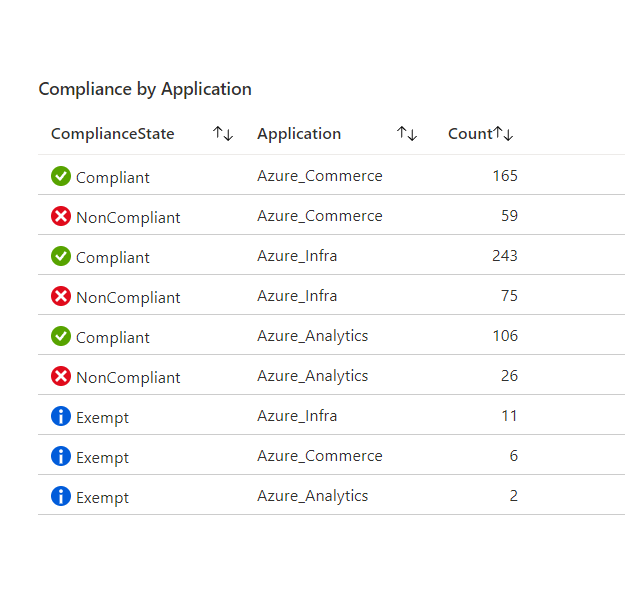
We can then go a little deeper and get compliance by Application
resources
| where tags.Demo_Application in ({Application}) or '*' in ({Application})
| extend id = tolower(id)
             | join(policyresources
             | extend ComplianceState = tostring(properties['complianceState'])
             | extend id = tolower(properties['resourceId'])) on id
| extend Application = tostring(tags.Demo_Application)
| extend properties = properties1
| extend ResourceGroup = tostring(properties['resourceGroup'])
| extend PolicyAssignmentName = tostring(properties['policyAssignmentName'])
| extend ResourceLocation = tostring(properties['resourceLocation'])
| summarize Count=count() by ComplianceState, Application
We can also get our compliance by Policy Assignment name and Application
resources
| where tags.Demo_Application in ({Application}) or '*' in ({Application})
| extend id = tolower(id)
             | join(policyresources
             | extend ComplianceState = tostring(properties['complianceState'])
             | extend id = tolower(properties['resourceId'])) on id
| extend Application = tostring(tags.Demo_Application)
| extend properties = properties1
| extend PolicyAssignmentName = tostring(properties['policyAssignmentName'])
| summarize Count=count(ComplianceState) by PolicyAssignmentName, ComplianceState, Application
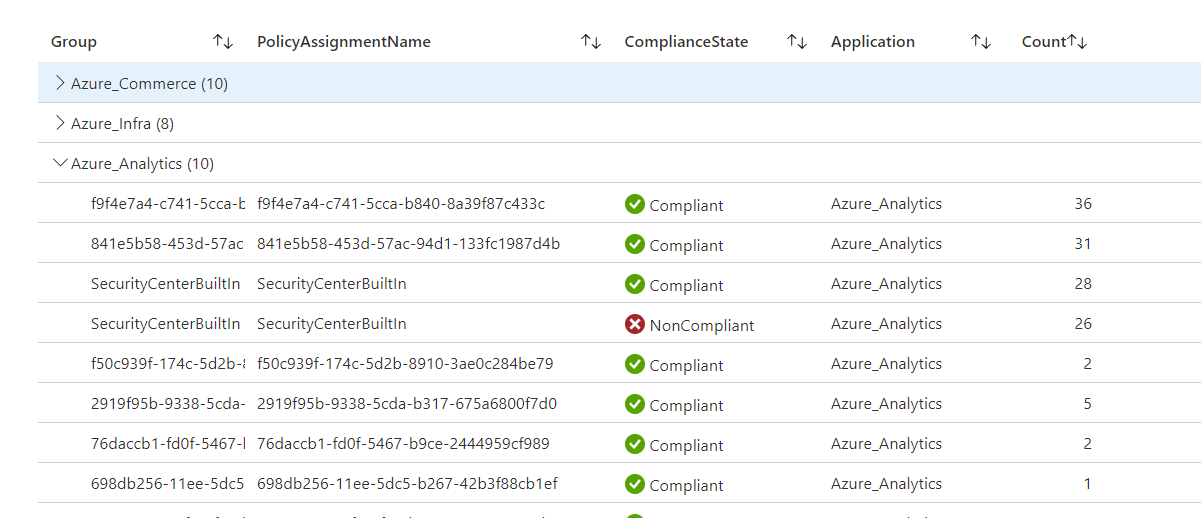
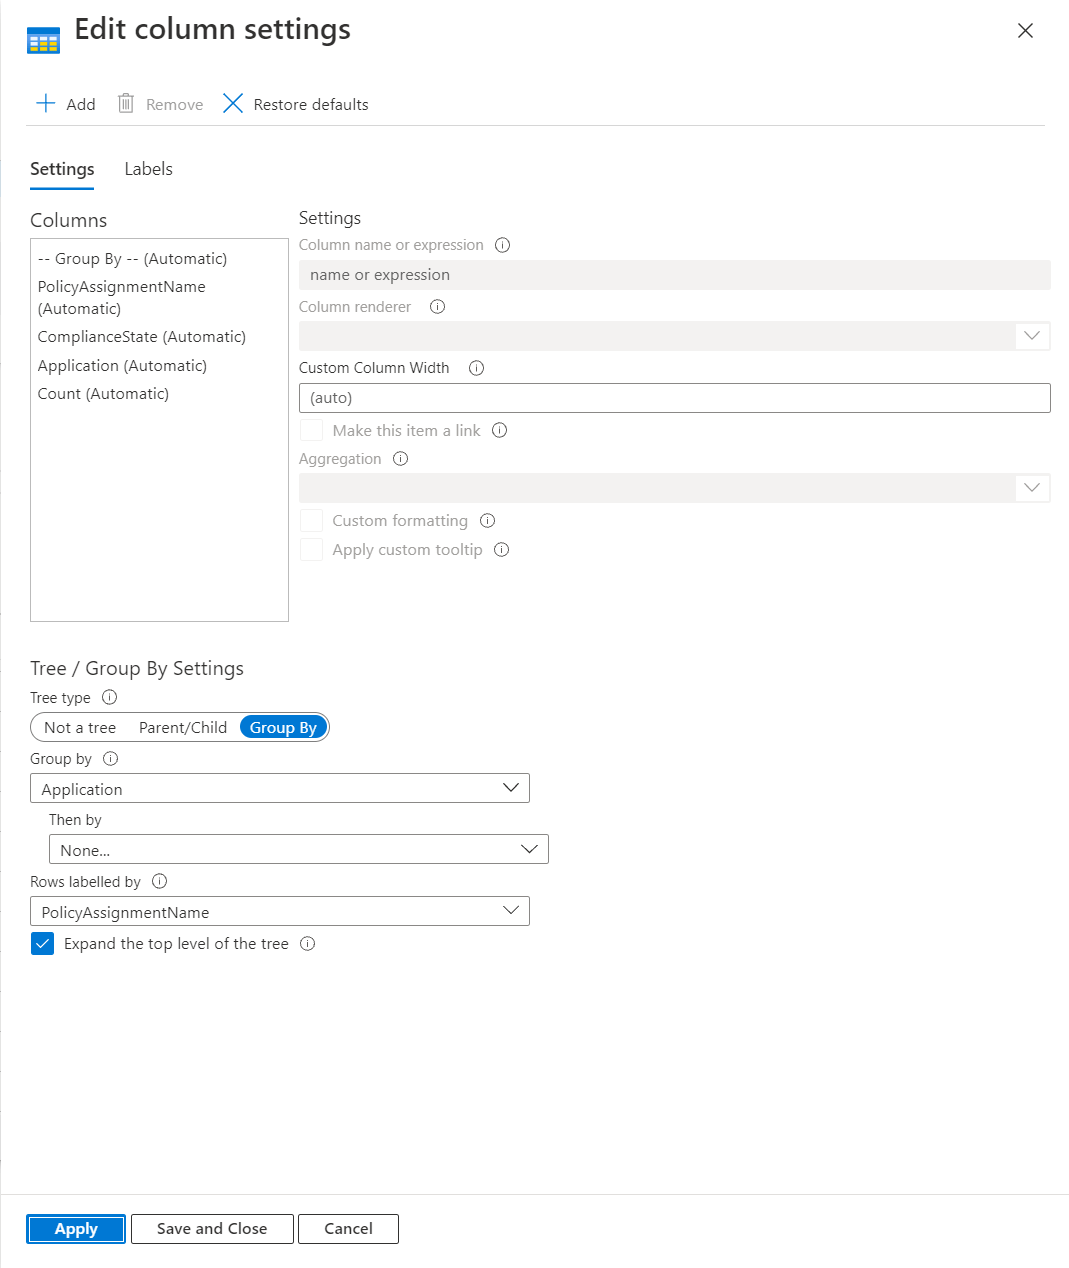
Since we’re in Workbooks, we have Group By feature, which I set to group by Application and then by Policy Assignment Name. This way we can see the compliance by policy assignment and application.
Finally we can get the exact resources and their compliance with specific Policy Assignments.
resources
| where tags.Demo_Application in ({Application}) or '*' in ({Application})
| extend id = tolower(id)
             | join(policyresources
             | extend ComplianceState = tostring(properties['complianceState'])
             | extend id = tolower(properties['resourceId'])) on id
| extend Application = tostring(tags.Demo_Application)
| extend properties = properties1
| extend ResourceGroup = tostring(properties['resourceGroup'])
| extend PolicyAssignmentName = tostring(properties['policyAssignmentName'])
| extend ResourceLocation = tostring(properties['resourceLocation'])
| project id, Application, ComplianceState, subscriptionId, PolicyAssignmentName
I hope you found this post useful. Happy Workbook building!