
This is the second post in some Azure Workbooks quick tips. You can find the first one here.
As your Azure environment grows, you’re likely to encounter situations where you have 2 or more subscriptions. Or if you are using Azure Lighthouse you might have dozens or hundreds of subscriptions under your management. This can quickly become unwieldy when viewing resources. With Azure Monitor workbooks, there is a grouping by feature. This feature is very handy to group your resources under subscriptions or under resource groups or some other metric.
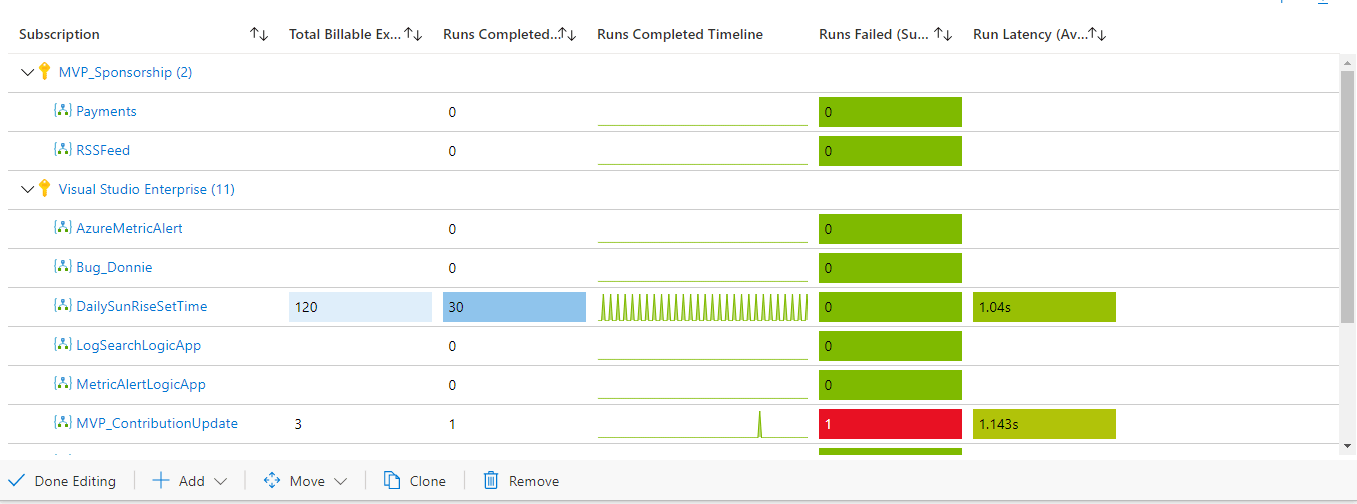
Metric Widget
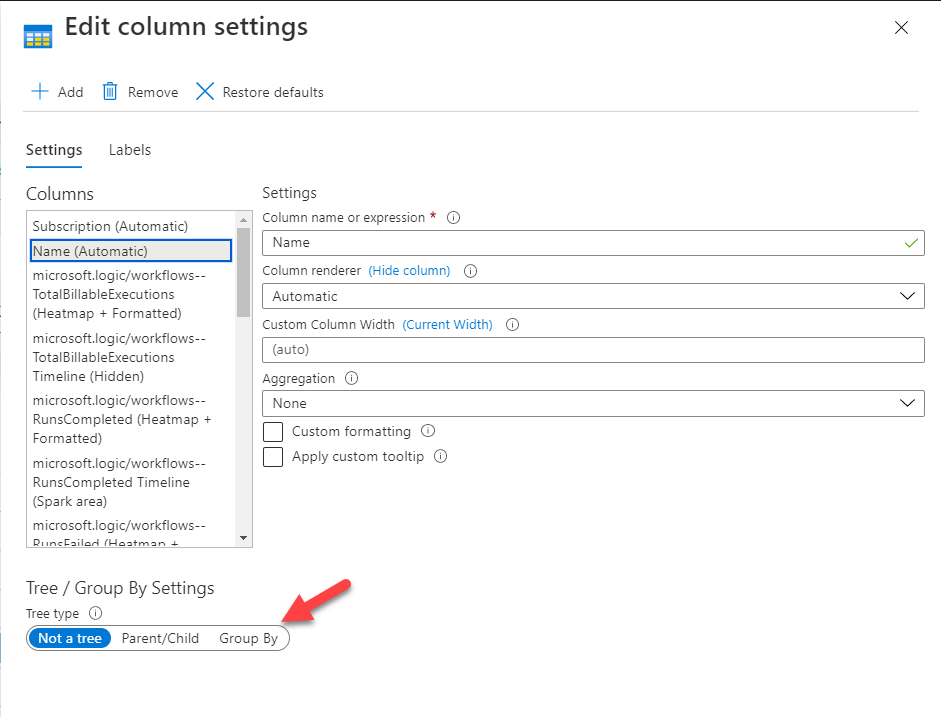
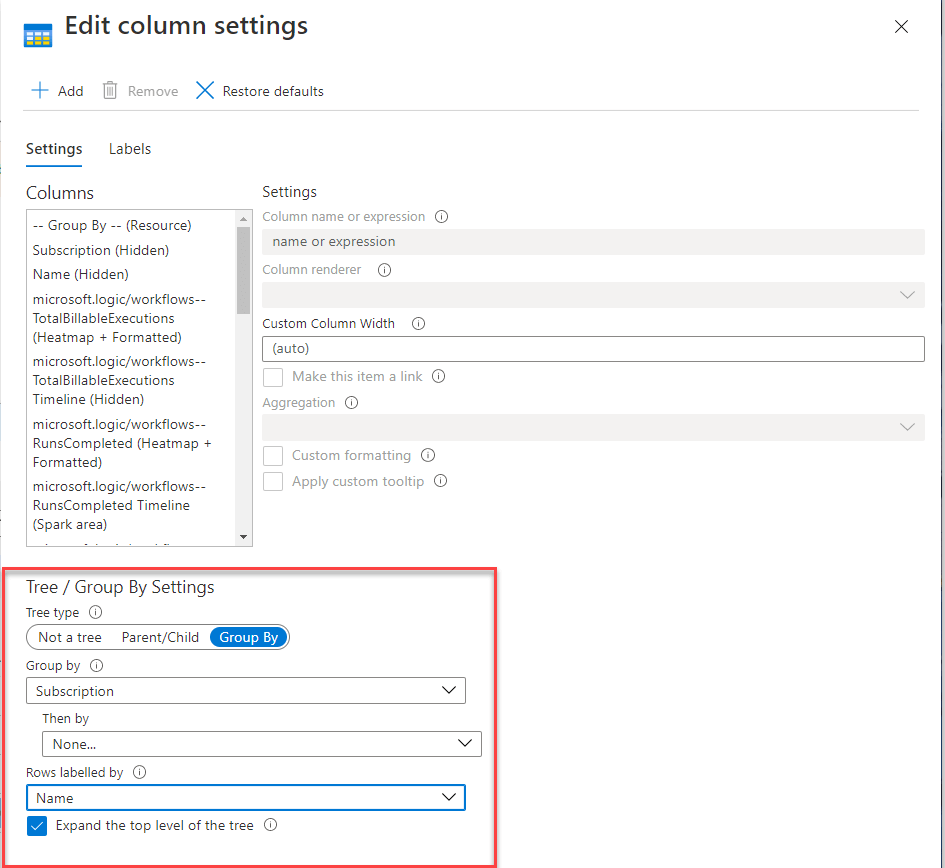
Example from my LogicApp workbook. When using Metrics everything we need is already included for us. Open “Column Settings” in your metric window. Select Group By.
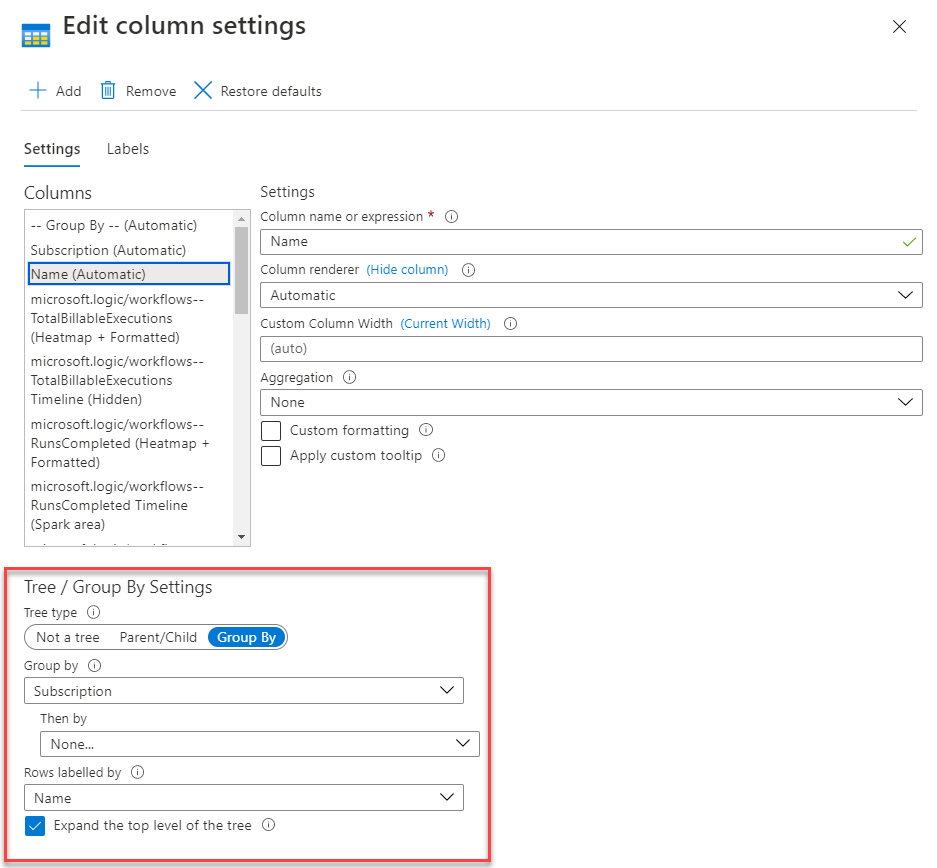
In my case I want to group by Subscription. So I select Subscription and then Rows Labelled by Name.
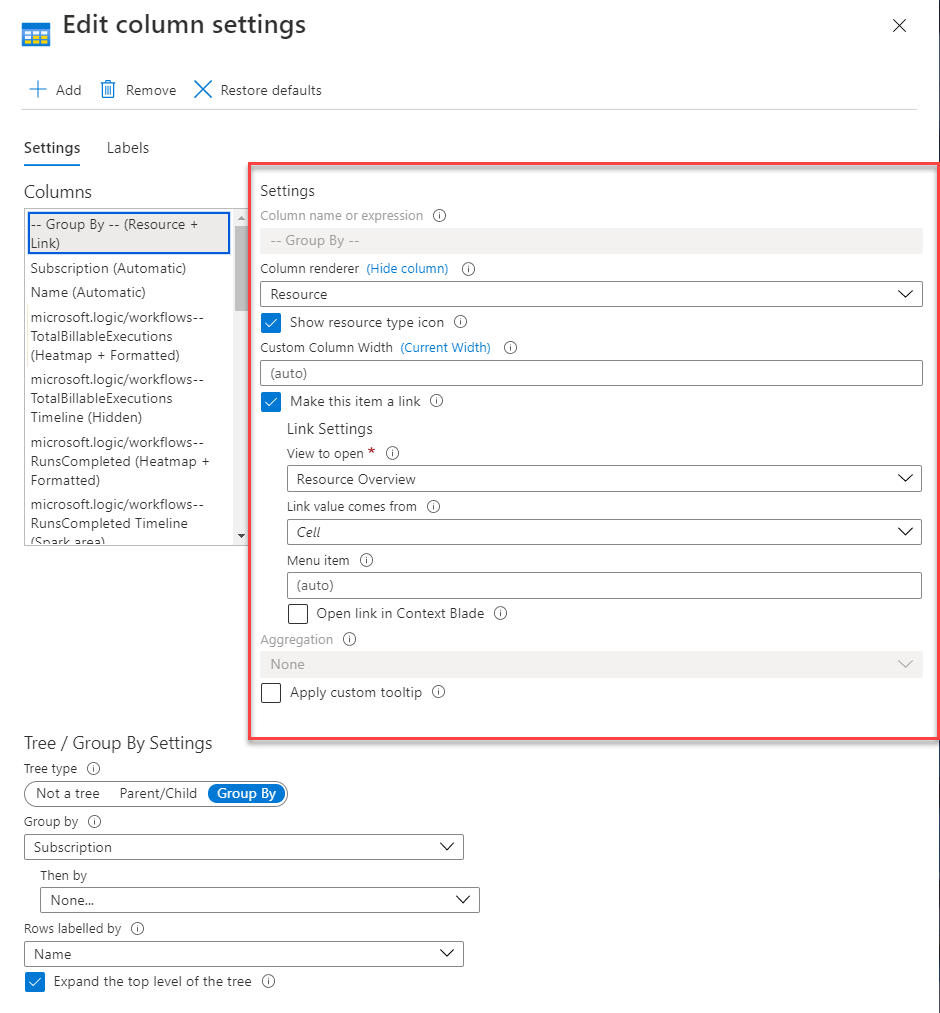
You may have to hit apply after setting the group by settings. Once you’ve done that, there will be a new column up top called “Group By.” Select Resource for the Column Renderer, then check “Make this Item a link” and select Resource Overview, unless you want a click on the resource to take you to some other area in Azure.
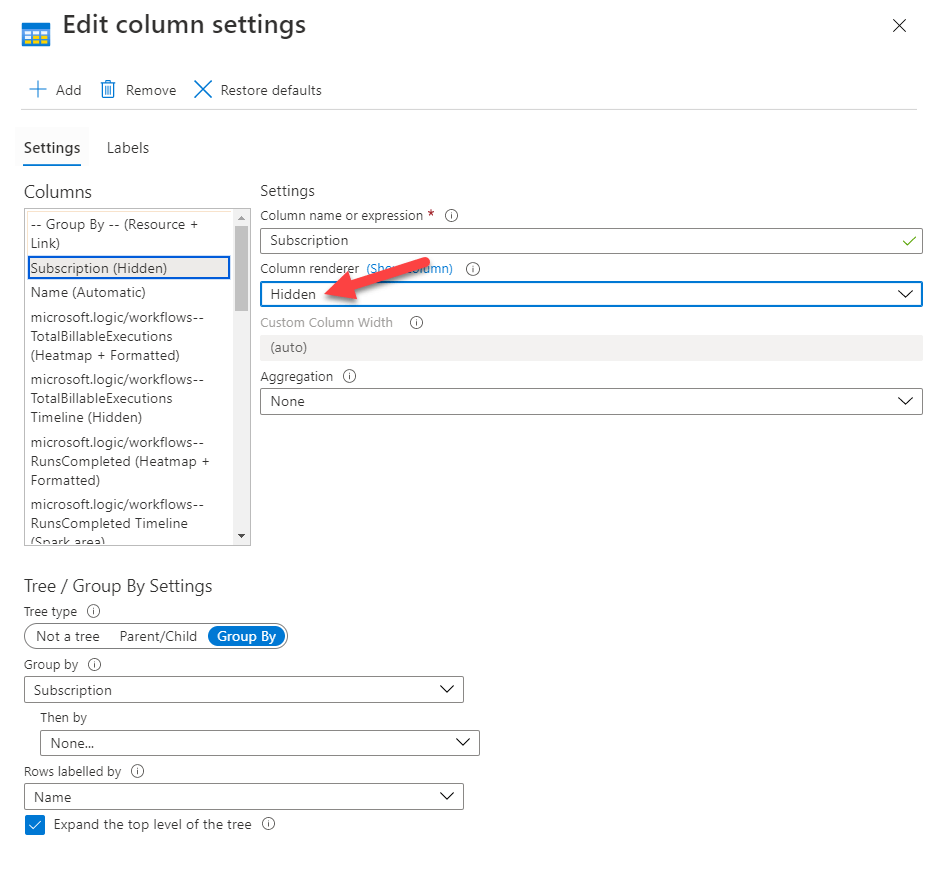
Next hide Name

and hide Subscription.
Now, we have a very nice and neat grouping, with clickable resource names under each subscription.
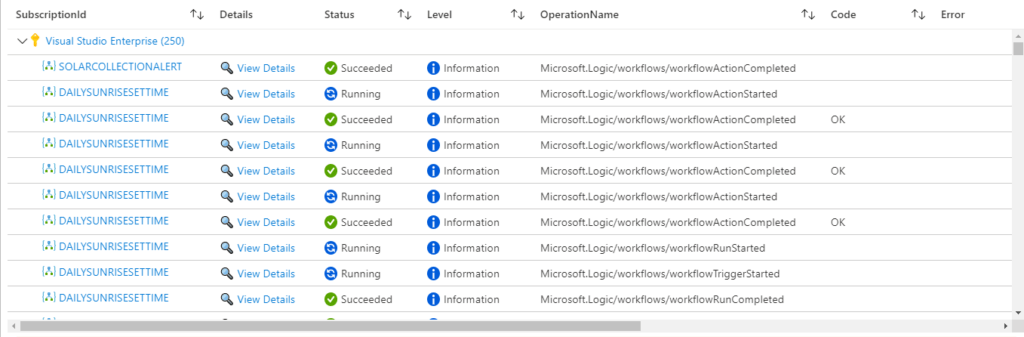
Log Based Query Widget
For log based query, its largely the same steps, except you need to include SubscriptionId or whatever field you want to group by in your query.
Follow the same steps as above and you’ll end up with logs separated out by subscription per resource. You could of course do this by Resource Group or any other field you want to group by.
I hope you find this helpful in your design of Azure Sentinel and Azure Monitor workbooks, and look out for the third post soon. Again you can find the first post on how to show Azure Resource Icons here. How to Show Azure Resource Icons in Workbooks – (cloudsma.com)