
This is my first post in our series on migrating from Orchestrator. You can see the announcement post here, which is also where I will keep track of all our posts. Donnie’s first post on Automation options within Azure got us started with whats available. One of the first things you need to do no matter what tool(s) you consider, is start learning source control. Orchestrator famously had no real source control. In fact you would have to take a runbook out of production just to test it, let alone make new changes to it. But in a more devops based world with these newer tools its generally required that you use source control, especially in larger teams.
Source Control for Operations
This post is largely aimed at operations people. Source control is nothing new, but in our world its been ignored for the most part. In fact I would posit except in the most organized environments its pretty much the wild west when it comes to scripting and automation. Where you end up with folders and folders of scripts that look like this:
myAwesomeScript.ps1
myAwesomeScript_new.ps1
myAwesomeScript_new1.ps1
and so on. Yes investing in source control does require an initial investment from you. However, its relatively small, but the more you learn and use it the more valuable your going to make yourself. You’ll be more “DevOps” related. Your current employer may not value it and it may not feel like it, but a lot of the big enterprise level IT organizations are now using this model for their operations.
Repository
A repository or repo, is essentially a folder that stores your files and folders and revision history of the files for your project.
Git
Git is a distributed source control system. In the Microsoft world it is compatible with both Azure Devops and Github. You can download it here. Once installed you can run the commands with Powershell. Since I’m still learning source control myself, I went to our expert Azure Devops Architect Amit whom I worked with to confirm what Git commands he would tell beginners to learn.
- git clone (download code from server to computer)
- git fetch (get latest info from server)
- git pull (download latest code)
- git status (status of your current workspace)
- git add (stage changes for commit)
- git commit (save changes locally)
- git push (upload changes)
There are numerous git commands you can use if you are a command line type of person. Personally the only one I use is git clone. The rest I let VS Code handle.
Visual Studio Code
VS Code has been my editor of choice for 2 years now. Its fast becoming the editor of choice in the MS Operations world. You can develop and test both your Azure ARM Templates and Powershell scripts in the same spot. It also fully integrates with Git for source control. Using VS Code with source control will more easily help you learn about it, instead of having to learn all the commands.
Git Clone
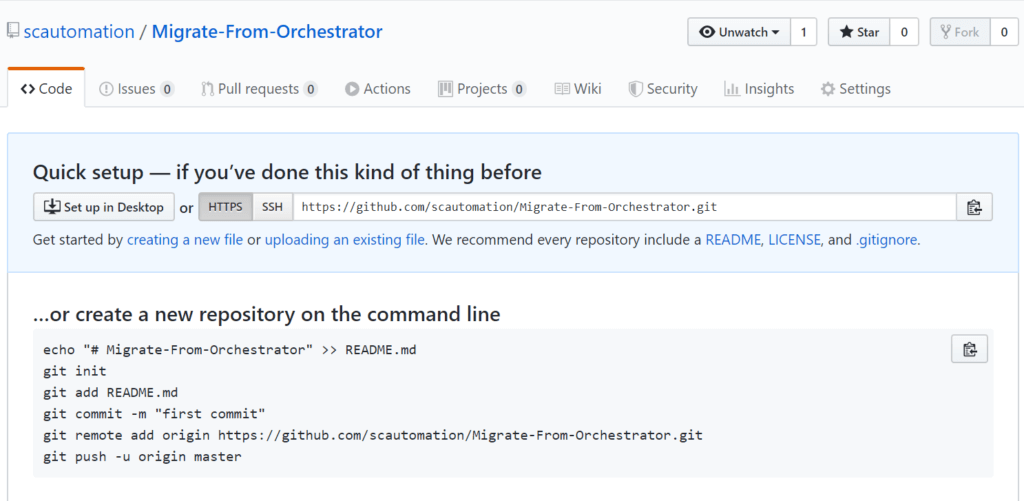
Setting up a new repo in my Github, you get prompted with the link and instructions on how to setup your repo via the command line.
In the terminal of VS Code, you can use git clone and the link to setup a local copy of your repo.

Git will create a folder with the same name as the repo name, you can change directory into it and type code . in the VS Code terminal and VS Code will open a new window specific to that repo.

Creating a new README.MD file.
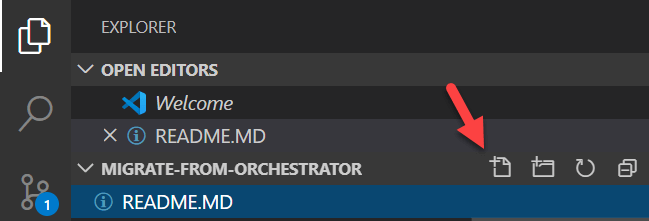
As soon as you create any files modify them, VS Code detects that there are changes to the repo. The 1 appears on the source control icon.
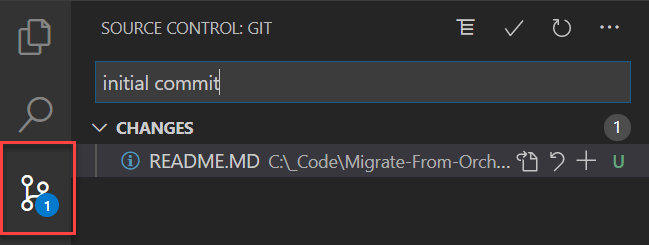
Every git commit requires a comment. You’ll often see funny twitter posts about frustrated developers that having to keep submitting comments. Try to be descriptive but precise in your comments.
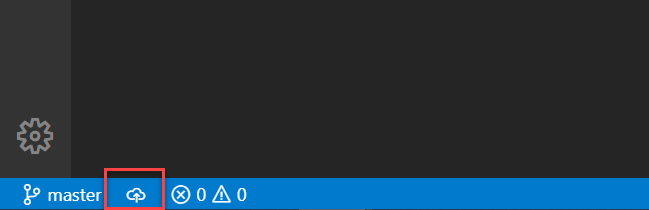
Finally, in the bottom left of VS Code, you see the cloud icon with the up arrow. Pushing that icon will push the changes to the github repo. This location will also show you if there are changes in the repo that are not replicated locally.
These steps created a Github repo, cloned it locally via command line. Then used VS Code to commit and push the readme file to the repo.
From here I could invite Donnie to my repo and any changes he made after being approved would need to be synced down, which you can use the same icon in the bottom right to push or pull any changes to and from my repository.
VS Code Extensions
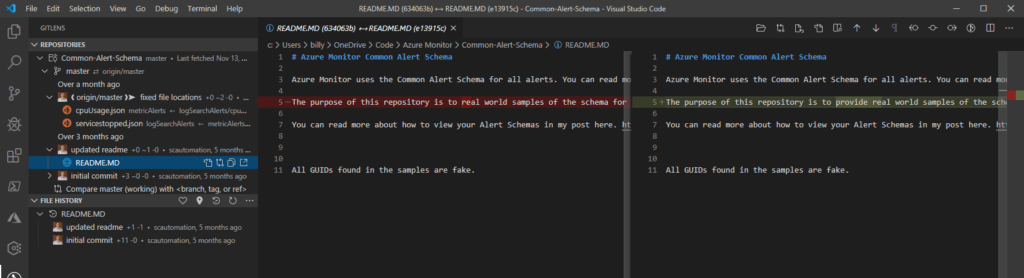
VS Code also has a number of extensions. One in particular called Git Lens will help with source control. You can use it to see revisions, branches, file history, and what changes were made, by who and when they were made.
There are also extensions for Azure Functions and LogicApps, both of which Donnie and I recommend as potential options to replace Orchestrator with.
Summary
Learning source control, while not necessarily fun, can actually benefit your career, as well as provide at least a little bit of organization to your automation world. This is just a brief overview of source control. My recommendation is find a developer friend that will walk you through some of the more complicated tasks. Having someone that can guide you through it live is often better than trying to figure it out by reading about it.